Server
- Download and install Scanner for Remote Desktop Server on the remote Windows PC you will be connecting to.
Thin client
- Go to Setup > Configuration > System > Firmware Customization > Features and check FabulaTech Scanner for Remote Desktop checkbox.
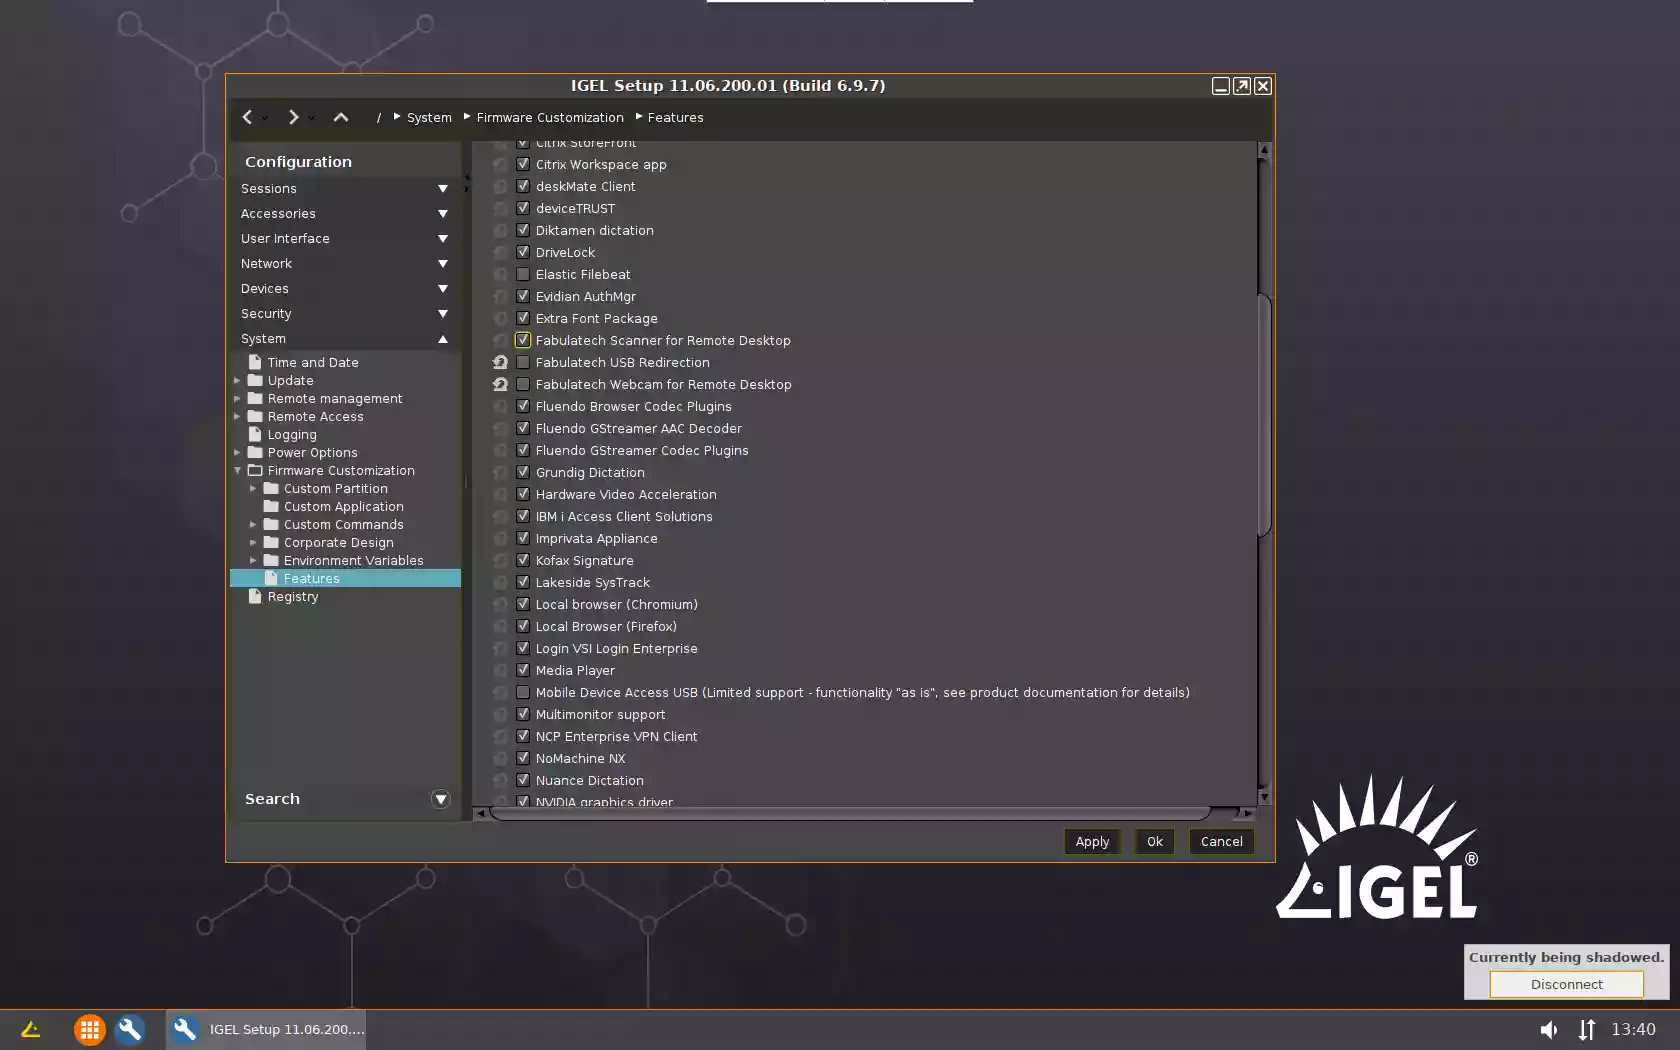
- Reboot endpoint device.
- Activate redirection in remote desktop connection configuration:
- RDP
- Check FabulaTech Scanner for Remote Desktop checkbox:
Configuration > Sessions > RDP > RDP Global > FabulaTech Scanner Redirection

- Uncheck Enable native USB redirection checkbox:
Configuration > Sessions > RDP > RDP Global > Native USB Redirection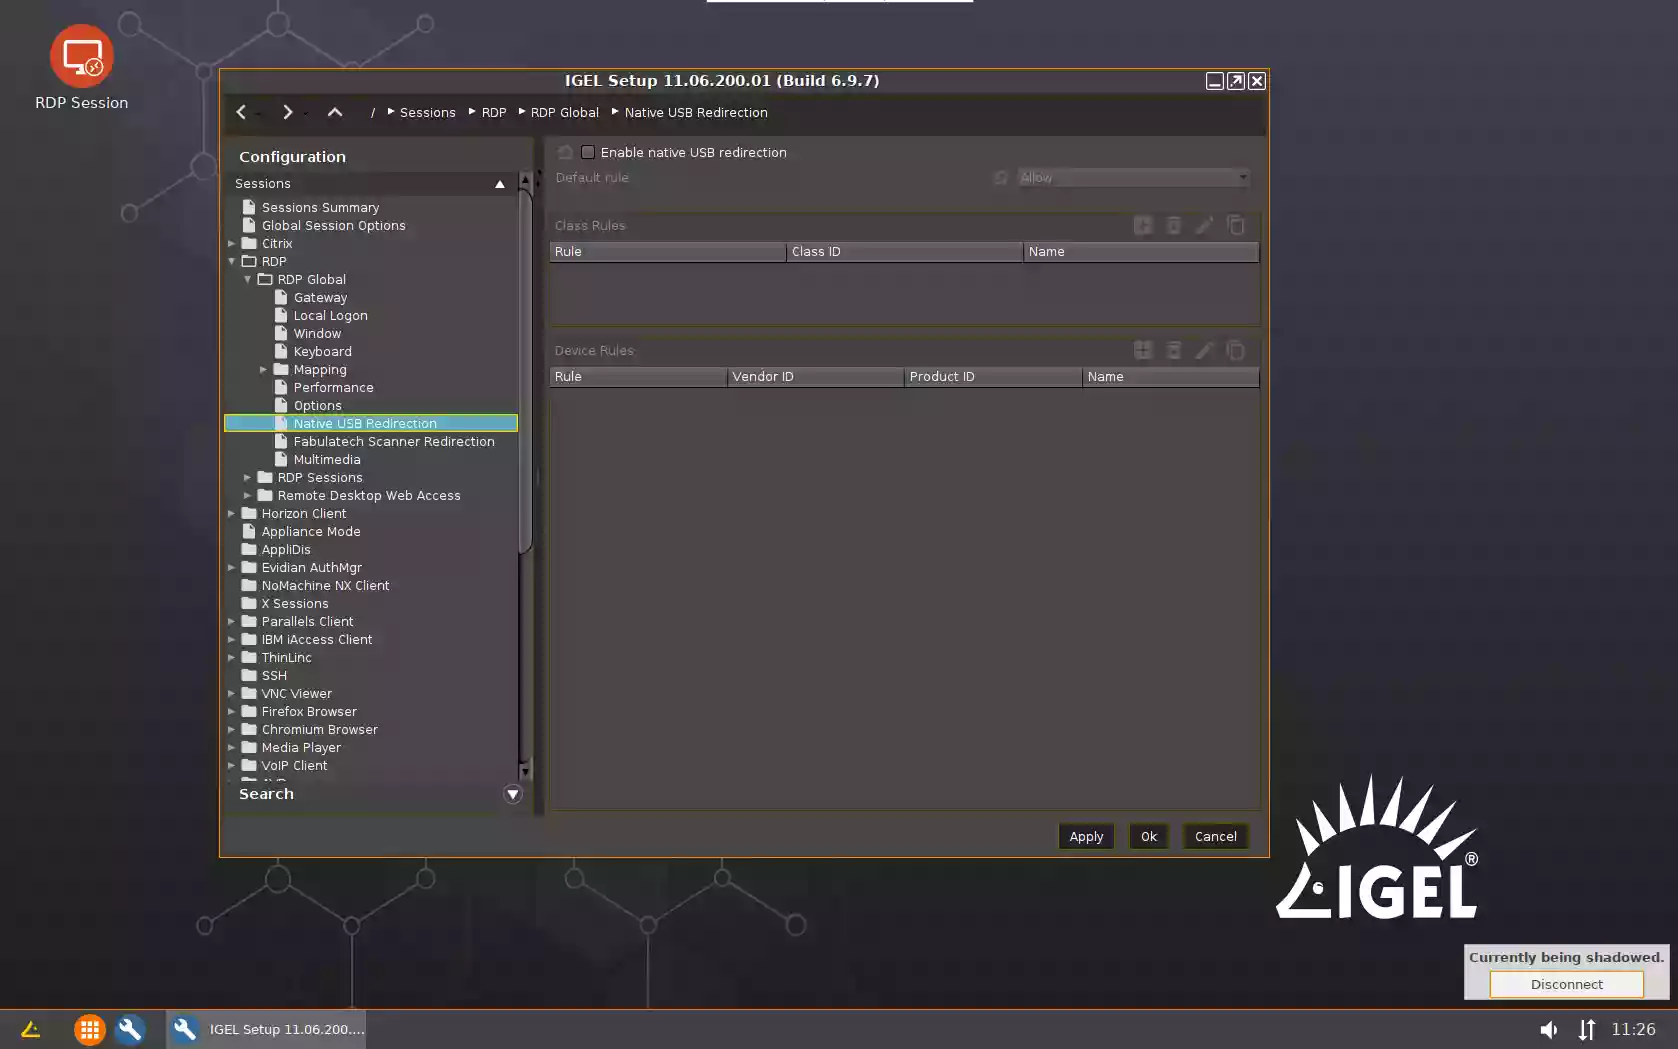
- Create a new RDP connection profile:
Configuration > Sessions > RDP > RDP Sessions - - Launch RDP Session and connect to the remote Windows PC. Scanners available for redirection will appear in the taskbar menu under the Scanner for Remote Desktop icon.

- Check FabulaTech Scanner for Remote Desktop checkbox:
- Citrix
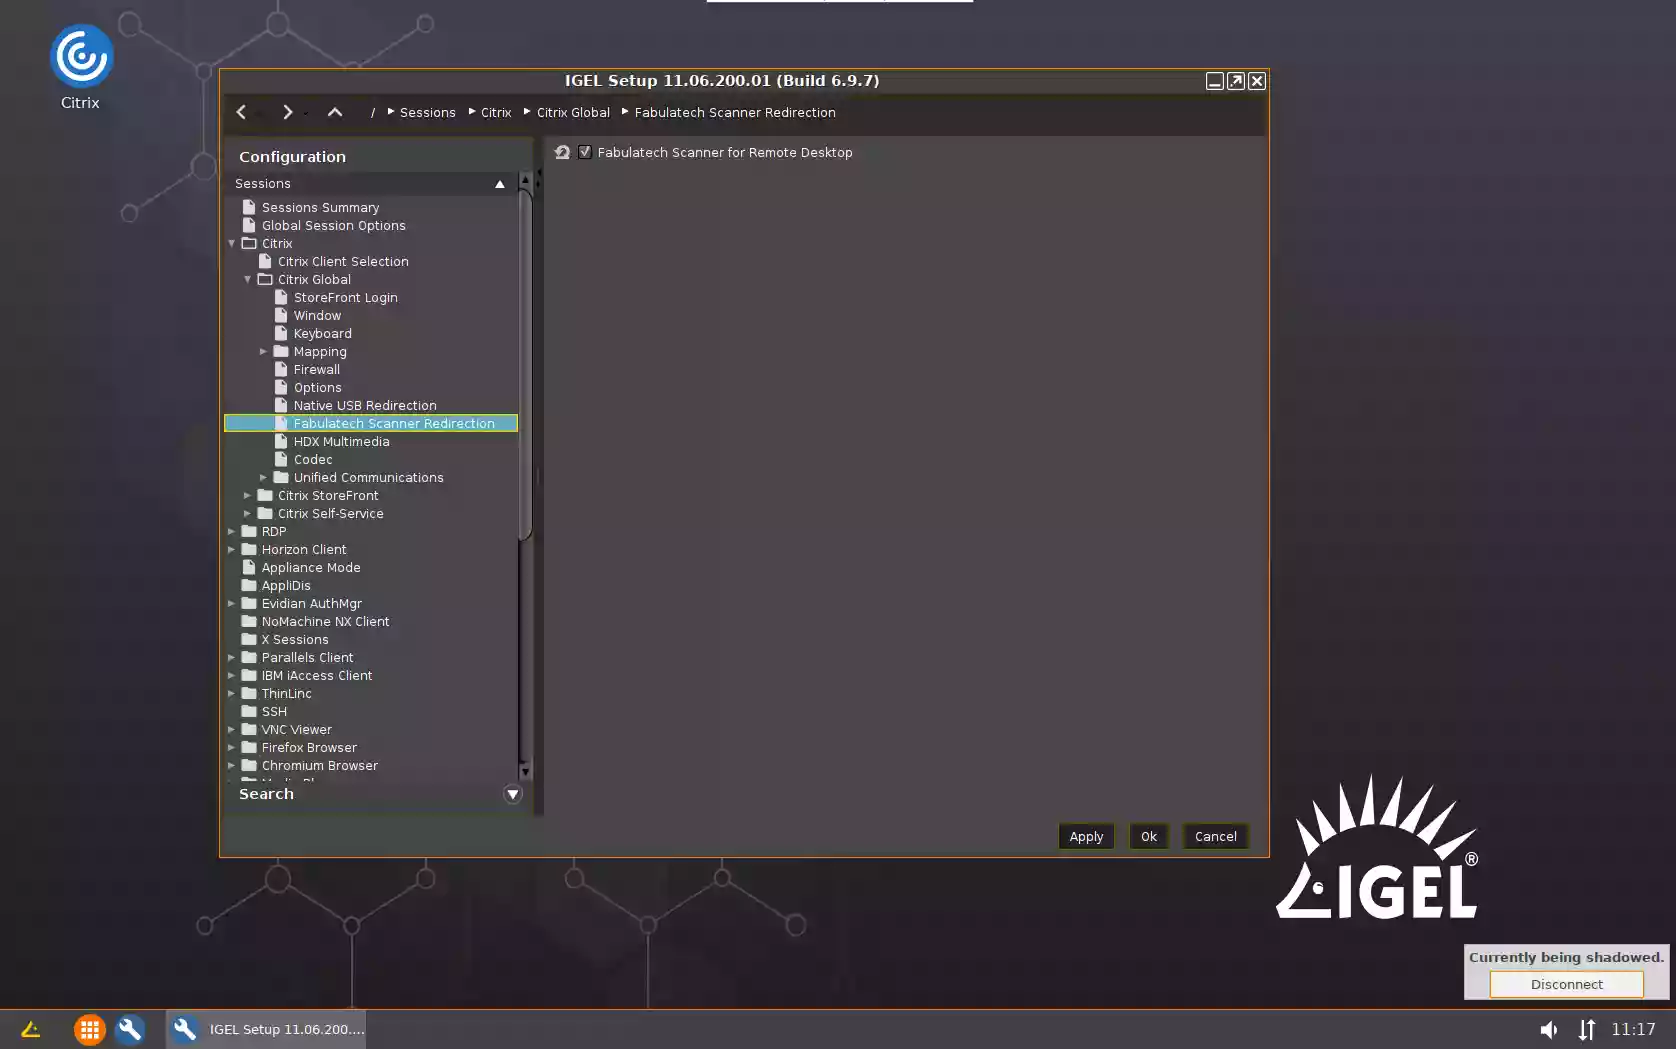
- Check FabulaTech Scanner for Remote Desktop checkbox:
Configuration > Sessions > Citrix > Citrix Global > Fabulatech Scanner Redirection
- Uncheck Native USB Redirection checkbox:
Configuration > Sessions > Citrix > Citrix Global > Native USB Redirection
- Create a new Citrix connection profile.
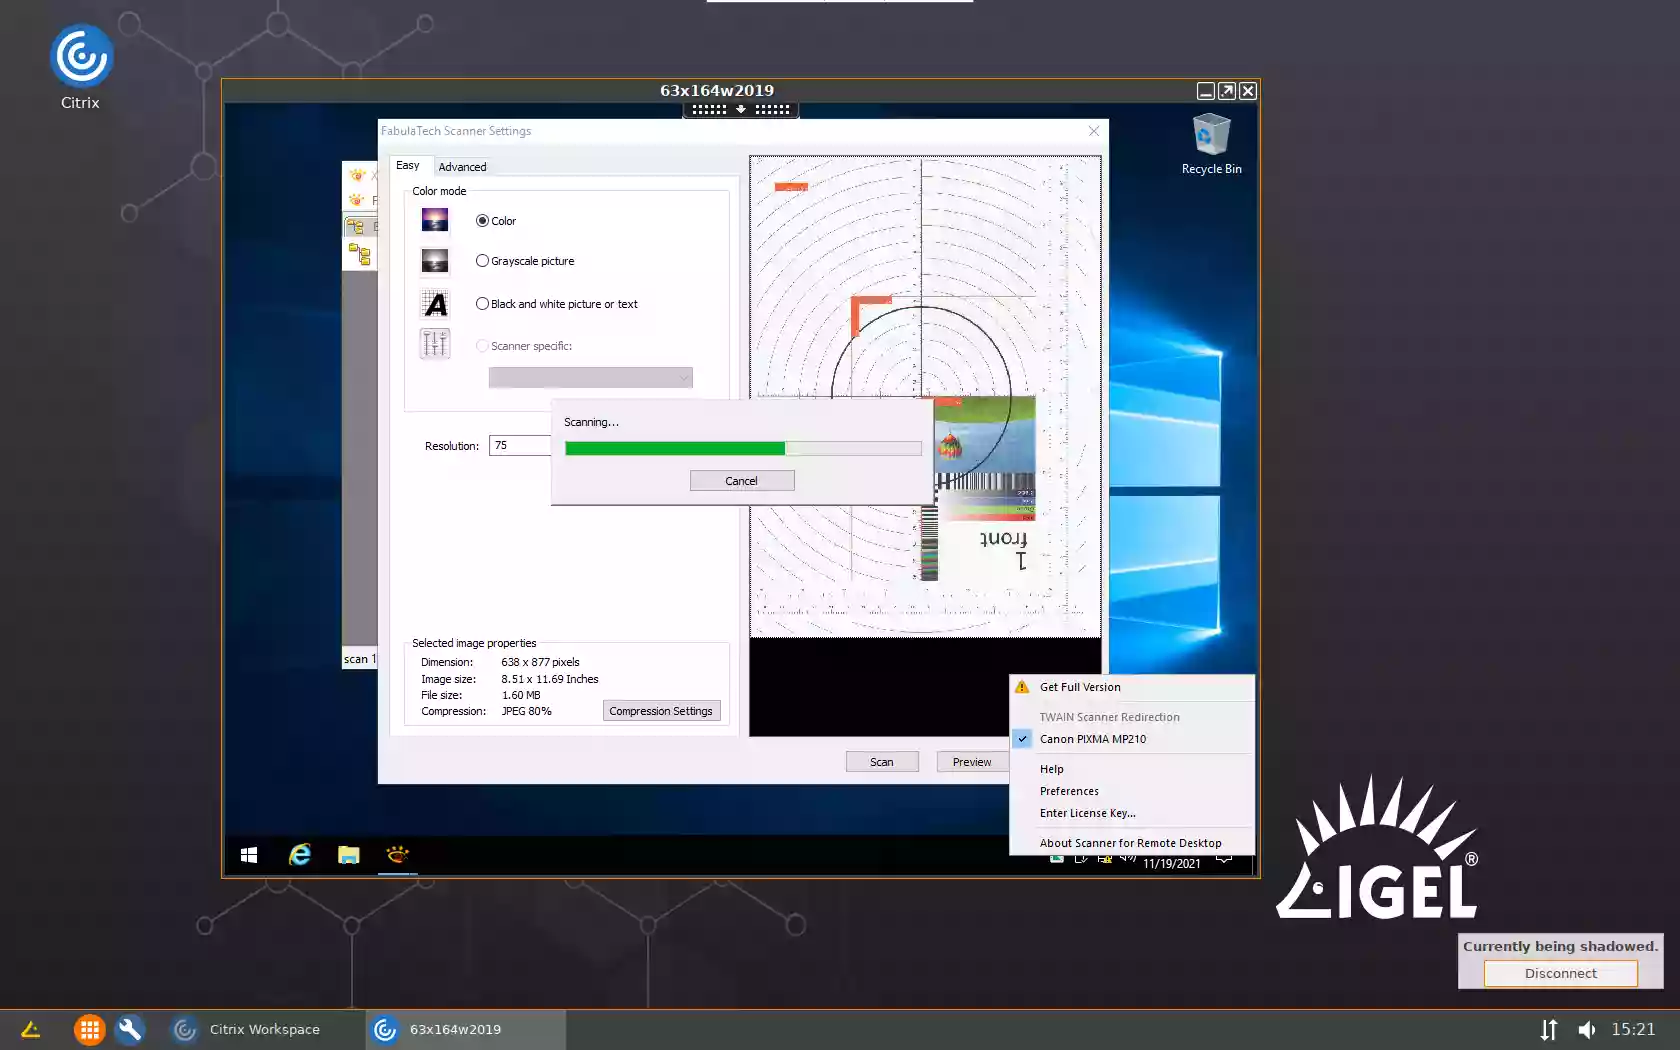
- Launch Citrix Session and connect to the remote Windows PC. Scanners available for redirection will appear in the taskbar menu under the Scanner for Remote Desktop icon.
- Check FabulaTech Scanner for Remote Desktop checkbox:
- VMware Horizon
- Check FabulaTech Scanner for Remote Desktop checkbox:
Configuration > Sessions > Horizon Client > Horizon Client Global > Fabulatech Scanner Redirection

- Uncheck USB Redirection checkbox:
Configuration > Sessions > Horizon Client > Horizon Client Global > USB redirection
- Create a new Horizon Client connection profile:
Configuration > Sessions > Horizon Client > Horizon Client Sessions -- No additional configuration required for PCoIP protocol
-
The following configuration required for Blast protocol (one time only):
- Enable the usage of virtual channel on the remote Windows machine (Server side): apply two *-_enable.reg files from this archive. There are also two *-_disable.reg files to unroll changes if required. Restart the Server after registry change.
- Launch Horizon Client Session and connect to the remote Windows PC. Scanners available for redirection will appear in the taskbar menu under the Scanner for Remote Desktop icon.

- Check FabulaTech Scanner for Remote Desktop checkbox:
- Microsoft AVD
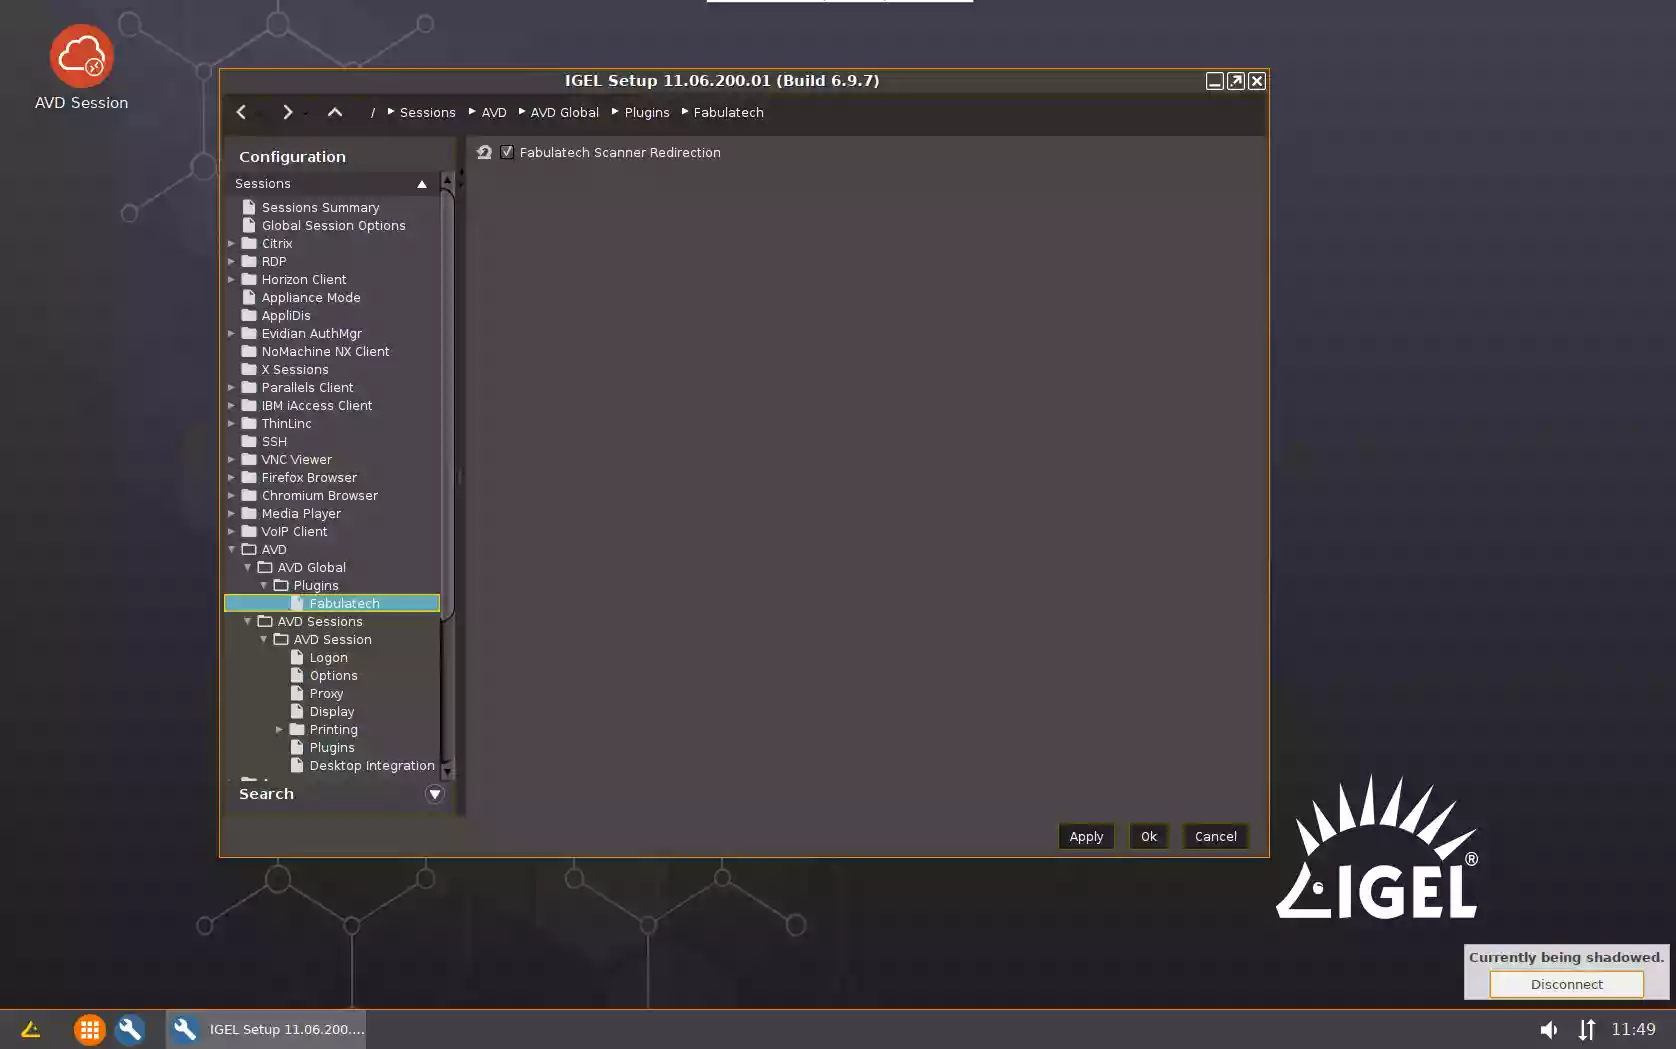
- Check FabulaTech Scanner Redirection checkbox:
Configuration > Sessions > AVD > AVD Global > Plugins > Fabulatech
- Create a new AVD connection profile:
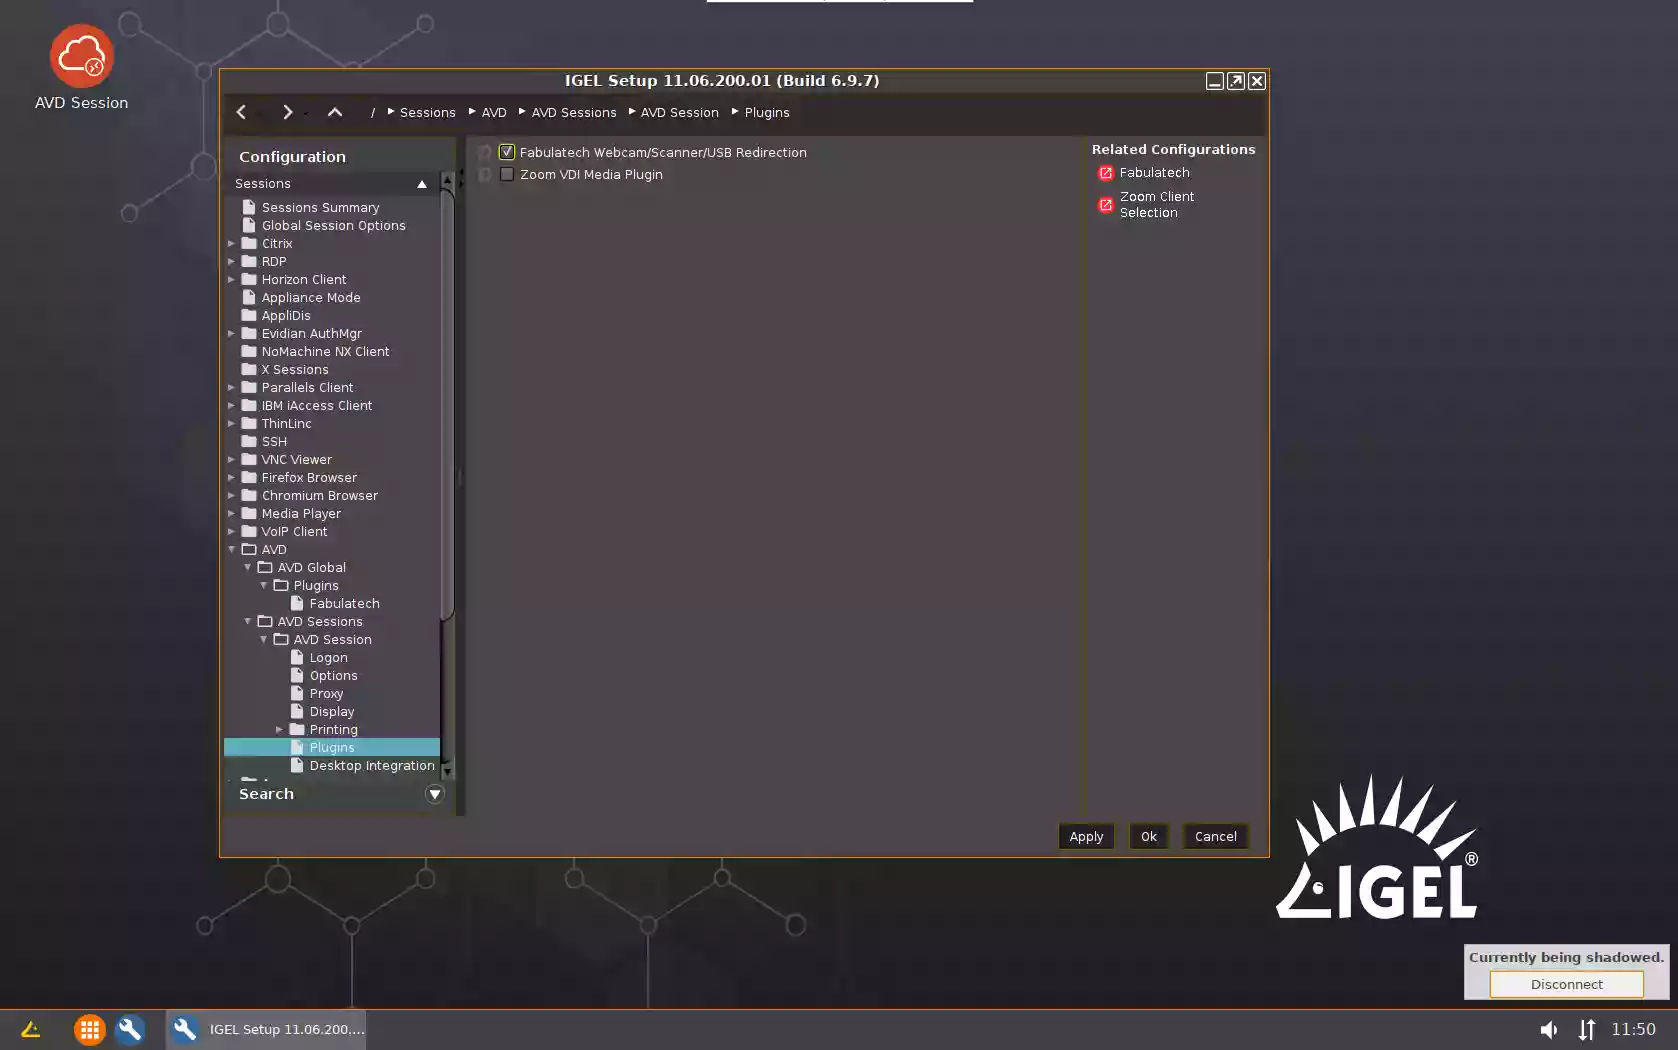
Configuration > Sessions > AVD > AVD Sessions - - Check FabulaTech Webcam/Scanner/USB Redirection checkbox:
Configuration > Sessions > AVD > AVD Sessions > [AVD_session_profile_name] > Plugins
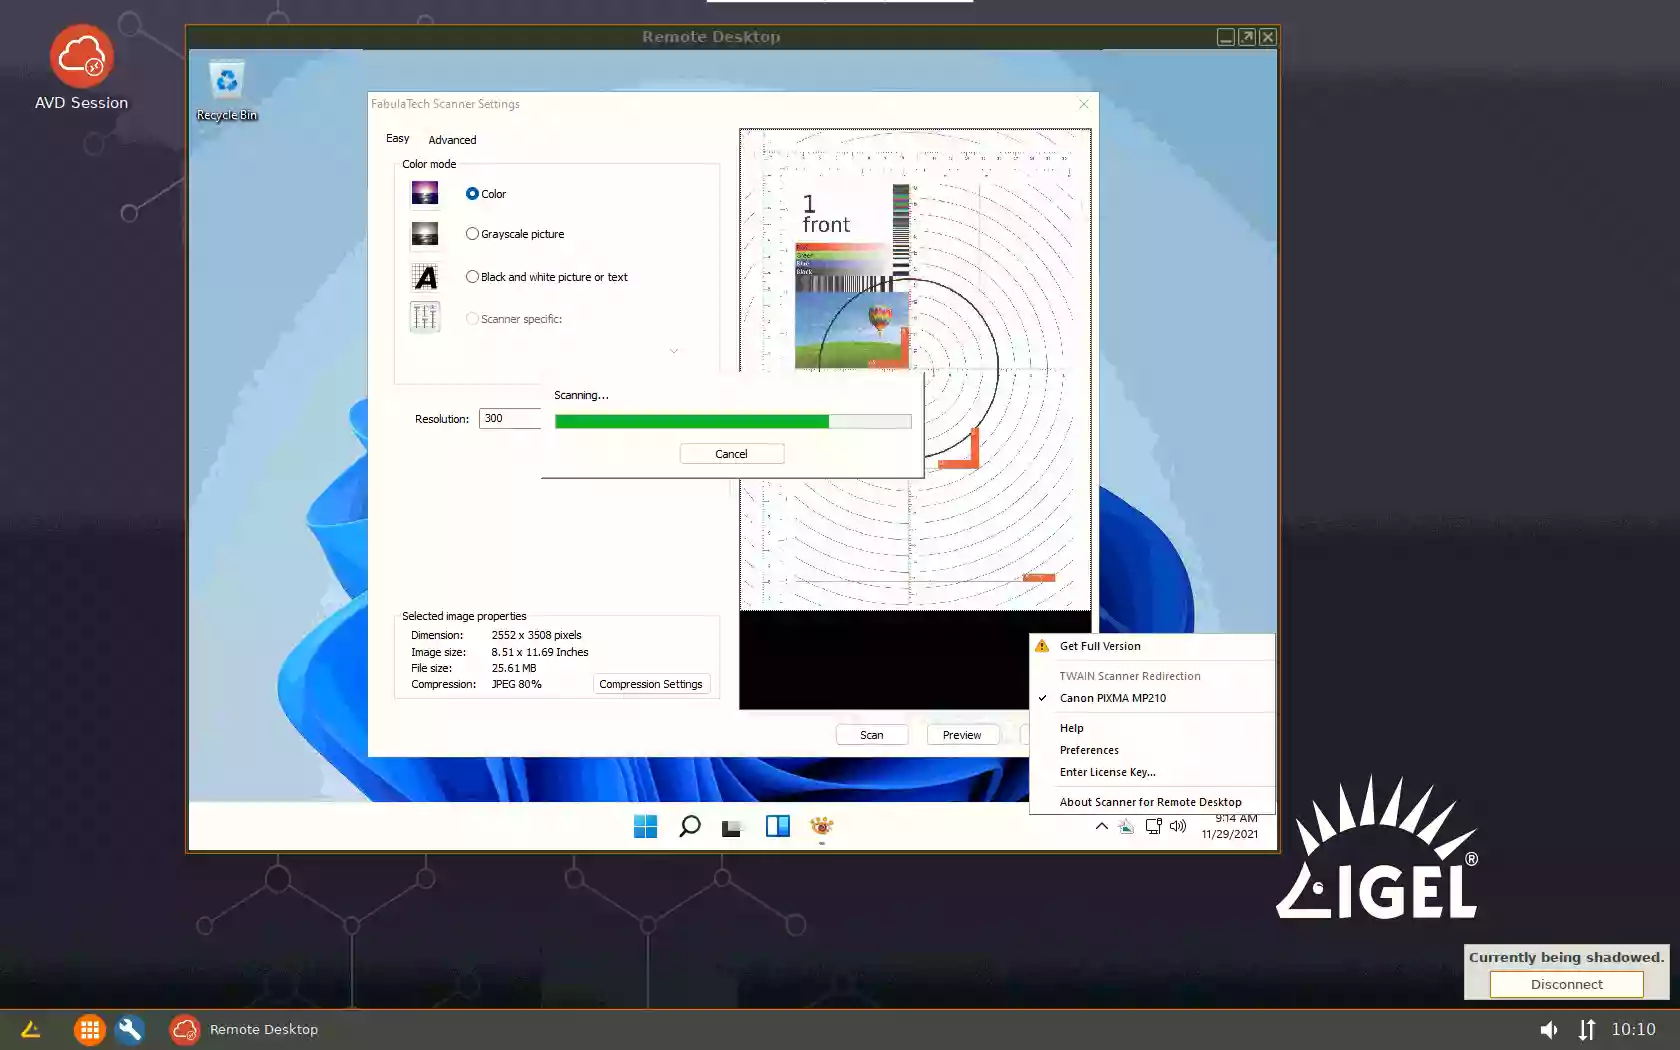
- Launch AVD Session and connect to the remote Windows PC. Scanners available for redirection will appear in the taskbar menu under the Scanner for Remote Desktop icon.
- Check FabulaTech Scanner Redirection checkbox:
- Amazon
- Launch our daemon and enable loading of our plugin (one time only). In the
Configuration > System > Firmware Customization > Custom Commands > Desktop > Final desktop command
add two commands:
/usr/sbin/ftscand
cp /usr/lib/pcoip/vchan_plugins/libvchan-plugin-ftpcoipbr.so* /usr/lib/x86_64-linux-gnu/pcoip-client/vchan_plugins/libvchan-plugin-ftpcoipbr.so - Create a new Amazon WorkSpaces connection profile:
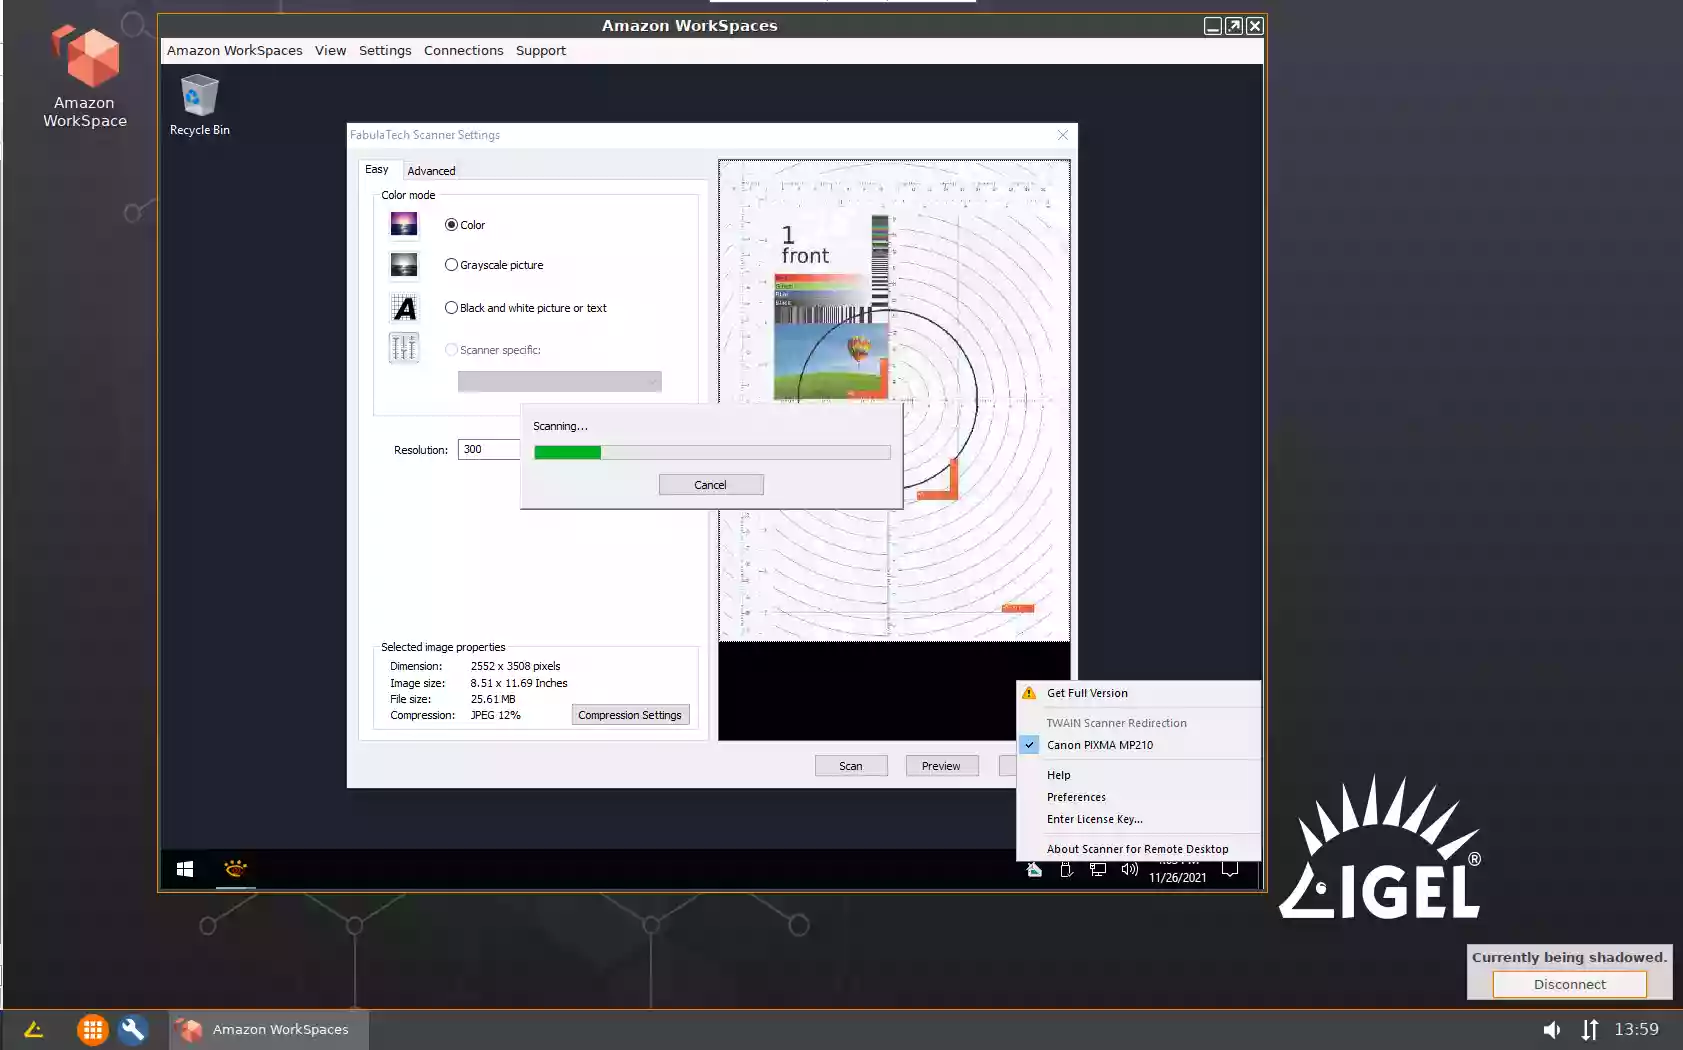
Configuration > Sessions > Amazon > WorkSpaces > Amazon WorkSpaces - - Launch Amazon Workspaces and connect to the remote Windows PC. Scanners available for redirection will appear in the taskbar menu under the Scanner for Remote Desktop icon.
- Launch our daemon and enable loading of our plugin (one time only). In the
- HP / Teradici PCoIP
- Launch our daemon and enable loading of our plugin (one time only). In the
Configuration > System > Firmware Customization > Custom Commands > Desktop > Final desktop command
add two commands:
/usr/sbin/ftscand -d
cp /usr/lib/pcoip/vchan_plugins/libvchan-plugin-ftpcoipbr.so* /usr/lib/x86_64-linux-gnu/pcoip-client/vchan_plugins/libvchan-plugin-ftpcoipbr.so - Create a new Teradici connection profile:
Configuration > Sessions > Teradici PCoIP Client > PCoIP Sessions > Teradici PCoIP Session - Launch Teradici PCoIP Session and connect to the remote Windows PC. Devices available for redirection will appear in the taskbar menu under the Scanner for Remote Desktop icon.

- Launch our daemon and enable loading of our plugin (one time only). In the
- RDP
Troubleshooting
Troubleshooting steps are the same as described in the Scanner for Remote Desktop (Linux version) User Manual. The only difference is location of Workstation daemon (ftscand) on IGEL thin clients: /usr/sbin/ftscand
Go to Setup > Configuration > System > Firmware Customization > Features
and check Scanner support / SANE checkbox.

Launch terminal, execute xsane command.
If the scanner is SANE-compatible, you'll see it in this app. Select the necessary scanner settings and try scanning.

If you don't see your scanner in xsane, search for 64-bit SANE scanner driver in the Internet, download (rpm or deb package) and unzip it into some folder, for example kodak. As a result, you will have 3 subfolders etc, opt, usr in the kodak folder. Use the following instruction (example for Kodak scanner i2000 and i3000 series) to install the scanner driver and test the scanner in xsane again:
Through the terminal and Igel Setup:
- Place the kodak folder to /wfs folder
-
Add file permissions through the following commands in the root terminal:
chmod 0777 /wfs/kodak/usr/lib/sane/*
chmod 0777 /wfs/kodak/etc/sane.d/*
-
Add these commands into the Final network:
cp /wfs/kodak/usr/lib/sane/* /usr/lib/x86_64-linux-gnu/sane/
cp /wfs/kodak/etc/sane.d/* /etc/sane.d/
echo -e "kds_i2000" >> /etc/sane.d/dll.conf
echo -e "kds_i3000" >> /etc/sane.d/dll.conf
echo -e "kds_i2000" >> /dev/.mnt-system/rw/services/unsupported03/upper/etc/scanbd/sane.d/dll.conf
echo -e "kds_i3000" >> /dev/.mnt-system/rw/services/unsupported03/upper/etc/scanbd/sane.d/dll.conf
echo -e "kds_i2000" >> /services/unsupported03/etc/scanbd/sane.d/dll.conf
echo -e "kds_i3000" >> /services/unsupported03/etc/scanbd/sane.d/dll.conf
Through the Igel Universal Management Suite (UMS):
- Add the files from the kodak folder to the file section:
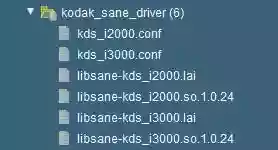
- Access rights should look like this
for .conf files: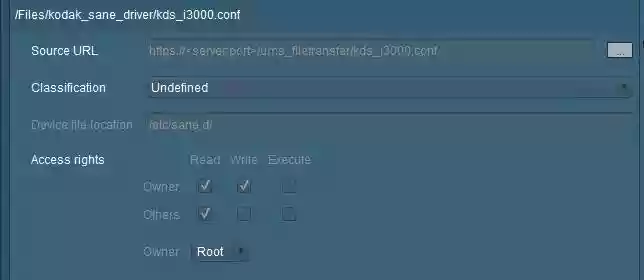 for .lai files:
 for .so files:

-
Add a profile which adds the new drivers to the SANE configuration so it will be possible to load them on IGEL OS SANE service startup:

-
Add these commands into the Final network:
echo -e "kds_i2000" >> /etc/sane.d/dll.conf
echo -e "kds_i3000" >> /etc/sane.d/dll.conf
echo -e "kds_i2000" >> /dev/.mnt-system/rw/services/unsupported03/upper/etc/scanbd/sane.d/dll.conf
echo -e "kds_i3000" >> /dev/.mnt-system/rw/services/unsupported03/upper/etc/scanbd/sane.d/dll.conf
echo -e "kds_i2000" >> /services/unsupported03/etc/scanbd/sane.d/dll.conf
echo -e "kds_i3000" >> /services/unsupported03/etc/scanbd/sane.d/dll.conf
